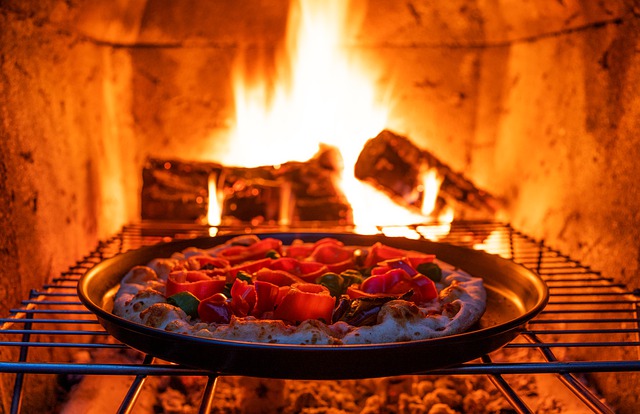
How to Light a Gas Grill
If you’ve ever tried to light a gas grill, then you know it can be difficult. A lot of people use lighter fluid, but this is not safe or healthy. The best way to light your gas grill is with an electric starter like the Weber Ignitor. It’s easy and fast, plus there are no hazardous fumes or liquids involved. Once you have your grill lit, make sure to follow these tips for grilling safely: always turn on the gas before putting the food on; never leave hot coals unattended; don’t put liquids on top of coals; place meat so that fat drips away from where it will flame up; never cook directly over flames if possible; keep lid closed as much as.
How to Light a Gas Grill? If you’re looking for the most efficient way to light your gas grill, read on! This blog post is all about how to do it with ease. We’ve also included some tips and tricks that will make this process even easier in case you don’t already know what you’re doing.
Table of Contents
Get a gas grill with a side burner
Some people are adamant that this is cheating, but you don’t have to make it the focal point of your deckbuilding. I use mine for Kang soup which can be pretty spicy.
How to Light a Gas Grill – The side burner is nice if you want to make some corn on the cob or a pot of rice (my preferred starch). It comes in handy when someone forgets their dish and doesn’t want to go another round without meat in their diet.
They also cook faster than an open flame. I’ve also never seen one malfunction and explode like a propane tank grill, though they do get covered with grease which detracts from their visual appeal (you might need a sheet pan under them when grilling meats.
Projected price: $500 for a 36″ Weber Gold in Brooklyn. Also available in Canada, but shipping may be cost prohibitive.
Build your own grill stand
Simple steel frame with glass top – $40
If you’re building the stand out of wood, then you might want to pick up some railroad ties . You can get them anywhere that sells garden supplies. They are easy to cut and assemble if they are treated (otherwise they will rot). Otherwise all you need is some cinderblocks, metal beams, or scrap lumber. You’ll probably have to throw on another 20 bucks or so for additional materials, but it will definitely bring the price down considerably from the prebuilt version above. Even if you build it with scrap wood, it’s still cheaper than buying off the shelf.
Projected price: $50 if you use railroad ties; otherwise around $100-200 for materials depending on the type of wood used and whether or not you’re using power tools to build it. Much like grills themselves, this also comes in several different sizes (I’m assuming that most people will want 36″).
Building your own grill is definitely much more cost effective than buying one at any store. If you know how to weld, then this would be even cheaper because you could probably make your own frame out of metal beams. The downside is that without proper oiling, they tend to rust much faster (depending on which material you choose).
Purchase propane, the type of gas that is required for your grill
These are typically 20 pounds of pressure. Note that this is not the same as what you use for your stove or gas-powered lantern, which are both 15 pounds of pressure, so do not get these cylinders confused.
Many hardware stores have propane tanks available to purchase on location, but if they are unavailable at your local store, it may be cheaper to buy them online. Fill up on tank(s) before heading out on any hikes.
A device known as a flow regulator is needed between the propane source and the burner nozzle on your grill or stove top in order to safely meet the pressures of each device. Check for this part when buying replacement bottles of propane; some companies sell kits with regulators and bottle in a single package.
How to Light a Gas Grill:
1) Turn on the grill, stove top or burner and allow the propane to flow through it. This will burn off any leftover gas from previous uses and ensure that there is no residue that may cause flareups or other accidents. Let this sit for about 5 minutes before lighting the grill/stove/burner.
2) Make sure all of your valves are open when using propane; never turn them about halfway because you think they were left on “just in case.” There is a valve between your tank and regulator which allows you to control how much gas leaves the cylinder. Turning this knob all the way clockwise won’t produce heat for cooking because it will only leave the minimum amount of propane to flow, but turning it counterclockwise allows more gas to flow and produces heat.
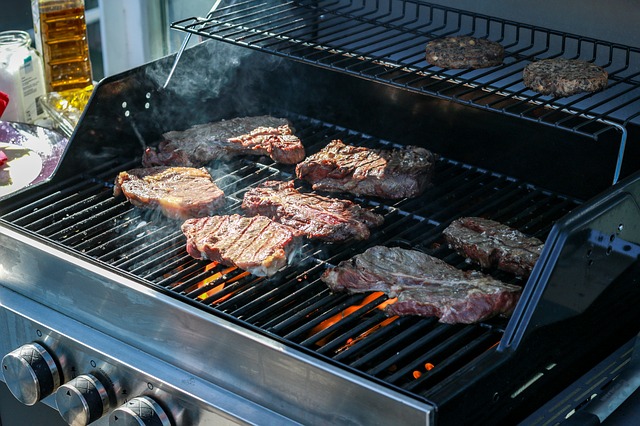
3) Light your flame using a lighter or match in one hand and turn your regulator knob with the other. If you have a grill, place any large pieces of raw meat on opposite ends so that they will cook evenly. For a stove top or burner, place the pot/pan over the flame and let it sit for about 5 minutes before cooking in order to heat up properly. Use tongs if possible when cooking on a grill because these grills get very hot!
4) Once you are finished cooking, remember to close off all valves before moving onto another activity. Turn them halfway clockwise just in case, but leave the one between the propane source and regulator opened to release any gas that may be left over. Turn off your grill/stove top/burner by turning all valves clockwise until they are closed. Do not turn them halfway unless you want everything to burn up!
5) Turn off your tank using your power wrench; this should be done every time after use, even if empty.
6) Let cool for about 10 minutes before handling (if cooking) or attaching (if fueling). NEVER attempt to refuel a hot or burning grill/stove/burner with another bottle of propane; this can cause an explosion. Be sure to check both ends of any lighter for fuel before attempting to ignite it; the first thing you should do if your lighter fails to light is to shake it out.
7) Store propane tanks/bottles upright inside of a secure location with some ventilation (i.e.: keep away from windows, flammable objects). Never store them inside your tent; they need to be somewhere where air can circulate around them during storage and transportation. Open flames should also be kept away from any propane sources at all times! Be sure to check for leaks before using or fueling anything.
When you’re ready to light it, turn on the side burner and use a match or lighter to ignite the flame
The grilling area can get very hot so be careful not to touch it accidentally. To cool the surface down quickly after cooking, turn off the burner entirely and hold your hand over top of it for a few seconds.
Soak some paper towels in water, then use tongs to twist them into a tight bundle and lay them on top of the burners. This will extinguish any remaining flames which may have burned up while you were scrambling eggs or something.
How to Light a Gas Grill – Have a fuel canister on hand in case you run out of propane. If the main tank is empty, or if it runs out while you’re cooking, it’s probably easiest to just replace the entire thing with a full one rather than try to find a place to refill it.
When finished cooking, turn off both burners and lift up the lid slowly . Be careful not to let any grease drip onto them—it will cause flare-ups at best and could damage your grill or catch fire at worst.
If grease has spilled over into the drip pan , clean it up right away so that nothing catches on fire later when the temperature gets hotter. A brush works well for this job but be very careful not to touch anything under it while you’re cleaning up.
If the hood light is on, turn off the burner and then use a match or lighter to turn it back off again.
To clean grill grates , hold them over the flame long enough to get them good and hot before turning off one of the burners. Use tongs to scrape any burnt food bits into your drip pan. Repeat until everything’s been removed from the surface.
You may also want to oil the grates after a few uses to make cleanup easier in future. If your stove comes with an oil can, do this by dipping a paper towel in oil and brushing it evenly across each section of grate—use caution when trying this, as some residue may drop down onto the burners. If this happens, turn off the burner and use a damp towel to clean it up right away—a dry one may flare up when it gets too hot.
You may like this: 10 Best Gas Grills Consumer Reports
Wait for about 5 minutes before opening up all vents and turning off the side burner
As you can see, it’s darker than what came out of the bag, but not by much. I couldn’t get a picture of it in direct sunlight, so this’ll have to do.
So what are they? Well, they’re irregularly shaped chunks of concentrated goodness. You know when you buy marinated meats or pre-made barbecue sauces at the store and they say “just add meat” or “add sauce to taste”? Yeah, well these are basically that on steroids for grilling aficionados!
How to Light a Gas Grill – The best part is that all you need to make them is some oil(olive’s fine), an onion(or garlic if you’d like), salt, pepper, and anything else you want to add flavor-wise.
This is my first article ever written on here, so constructive criticism would be appreciated. This is also the very first BBQ rub mix that I’ve ever made, so if anyone has any suggestions or recipes on making it better next time around, let me know! Thanks for reading, and happy grilling.
Mix together all ingredients in a bowl(except water) until thoroughly blended, then add enough water to create a mixture with the consistency of pancake batter. Make sure it isn’t too watery though! If it is…you’ll have some problems later on because the coals will die quickly once they’re lit, so keep that in mind while mixing up your marinade/baste.
Now take whatever meat you want to baste/marinate and coat it evenly, making sure to get in all the crevices.
I used a baby back rib rack for this article.
Now seal everything up in an airtight container or freezer bag and let it sit in the fridge overnight; 24 hours is even better if you have the time. Once that’s done, just cook it on your grill until the center reaches your desired temperature(with meat, people usually say 145°F for pork and 160°F for beef), then enjoy!
And remember: don’t touch that dial once you’ve turned down the heat! You’ll be cooking at medium-low to low heat for upwards of 7-11hrs depending on what you’re cooking you can’t speed up how long it takes to cook by turning the heat up.
Now that I’ve got you thinking, there are a few other things you can do during this time frame too: smoke your ribs or chicken(I’ll be doing this in my next article), sear steaks/burgers on the grill while meat is still inside and closed with the lid, and if you want some really crispy skin, lay down aluminum foil directly over the coals before putting just about any kind of meat on. You can also use indirect heat for roasting large vegetables such as whole heads of cabbage or even butternut squash!
Turn on one of the burners and adjust as necessary until it’s at an ideal cooking temperature
Do this for all burners
Once that’s done, take out whatever you’re cooking and place it as far away from the flames as possible (usually over to the other end of the stove). Turn off one of the burners and allow it to cool down before touching it again. This is important; we’ll explain why later.
If your stovetop does not have markings indicating which burner heats up to what degree, use a heat-resistant measuring tool like an oven thermometer to test them: they should each be different enough in temperature so that there’s no overlap between adjacent burners.
How to Light a Gas Grill – It’s also important to know whether your stove uses radiant heating or conductive heating . Most electric stoves will use radiant heating , while most gas stoves use conductive heating . Both of these create heat that is strong enough to melt metal, so it’s important not to leave any utensils or cooking tools on the stove unattended. If you’re in doubt about whether your stove uses radiant or conductive heating, please check with an adult before trying this experiment.
Radiant vs Conductive Heating
A radiant gas burner (left) has no exposed metal to be melted by the flame; anything placed on top gets heated by infrared radiation emanating from the flames themselves. A conductive electric coil (right) will actually get hot enough to burn if left in contact with the elements for too long, and can damage countertops unless protected by a trivet or stone tile.
See more: Top 10 Best Gas Grills Under $500
Conductive Heating
A gas stovetop burner, on the other hand , will burn something placed directly onto it so long as the flames are strong enough. Although this won’t happen with a radiant burner, you can still damage your stove top by leaving metal utensils on your electric coils for too long – they can get hot enough to scorch wood and melt plastic.
Preparation: Make sure that there’s nothing flammable nearby that could catch fire from stray sparks or heated air from the flame. The area where you’re working should be clear from any fans or breeze-creating devices (like ceiling fans). If possible, seek an adult’s permission before doing this experiment; this is not a good activity to be doing without supervision.
Preparation for this particular experiment should take no more than 20 minutes, and requires nothing more than a stove and whatever food you plan on cooking. We recommend that you only do this after your parents or other adults have agreed to help supervise – please don’t try this alone unless given permission.
Procedure: Please follow the instructions below carefully! Like all activities involving fire, an oven or stove must be respected as a potentially dangerous tool which can cause severe injury if misused. If there’s any question about whether it’s safe to do an activity like this one, always ask for help from an adult first!
Place food onto grill grates – do not place directly onto coals because this will lead to flare-ups!
Chicken, burgers and steaks should be placed about 5 to 6-inches above the coals. Heavier foods such as briskets or pork shoulders should be placed further away from the heat to allow for an oven-like cooking environment.
Before placing food on the grill, oil your grill grates using tongs and a folded paper towel to reduce the chance of sticking and to aid in food release when cooking. Make sure you use tongs instead of a fork or other sharp object because piercing meat will cause loss of valuable juices which contribute to flavor. Many home chefs like to use nonstick sprays for this job because they can generate large amounts of smoke during preheating, so this is definitely not recommended.
Open the lid, using it to shield you from the intense heat and smoke that will be generated once the coals are ready. This way you won’t lose any valuable time waiting for the grill to preheat. Also, close vents in the bottom of your BBQ while cooking because this allows for a more consistent heat and also traps heat inside which speeds up cook times.
How to Light a Gas Grill – Soak wood chips (such as hickory or mesquite) in water before grilling to prevent burning and add extra flavor to your meat. If you’re using dry wood chips place them directly onto red-hot coals right before placing food on grill. You can also use soaked wood chunks instead of chips if desired. To add an extra layer of smoky flavor, place a disposable aluminum pan filled with water on top of preheated coals or burners to release smoke into the grill cavity.
Whether using gas or charcoal for your BBQ, you’ll need to take temperatures regularly throughout the cook time to make sure meats are cooked properly. It’s important not to rely on only one method (e.g., an instant-read thermometer) because readings can vary depending upon where inserted in the meat and thickness of meat being measured. For example, if you’re cooking thick steaks which might be 1″ thick at one end but taper down to around 0.5″ at the other end, there will be a large difference in temperature readings between the two ends even though the meat is properly cooked.
>> How to Light a Gas Grill SAFELY:
See more: Top 7 Best 3 Burner Gas Grill – Reviewed and Compared
Final Thoughts
Gas grills are great because they don’t need lighter fluid and you can control the temperature more easily than with a charcoal grill. If you want to light your gas grill, follow these simple steps before applying any food or accessories. You may also find our reviews of different brands helpful if you are looking for a new gas grill that is right for your needs.
How to Light a Gas Grill? If you have any questions, please leave a comment! I hope this has been helpful for you and if so, please share it with your friends! Thank you!
See more: