Electric grills are a great way to cook food in your home. You can use them indoors and the temperature control is perfect for when you want something less messy than cooking on charcoal or propane! But of course, some people might not get much flavor if they’re used only using electric grates since there isn’t that fiery sear like what we see with classic gas models.
If you want to grill like a pro, but don’t have access to an outdoor grill or smoker, then try cooking on an electric grill. Here are some tips for getting that smoky charcoal flavor. First, never cook with the lid closed because heat will escape and this can dry out your food. Second, if possible use lump charcoal instead of briquettes to get more authentic flavor. Third, make sure not to overcrowd the grate so that there is plenty of space between the food and any other objects touching it while grilling – this will help prevent burning. Fourth, always use tongs when flipping meats over in order better control how much contact they have with the direct heat source which helps maintain tenderness by preventing overcook.
How to get charcoal flavor on an electric grill [Detailed guide]
Table of Contents
Clean your electric grill before cooking
If the electric grill is still wet, it can be cleaned with a dry cloth or paper towel. If you prefer to use water, make sure the electric grill has cooled down first. When cleaning an electric grill without non-stick coating, never use abrasive sponges since they might leave fine scratches on the metal surface (wet & dry paper towels are safe for non-stick coated surfaces). Also never use oven cleaners or dishwasher liquids because these chemicals will damage the appliance. The cleaning brush provided with some models can be used to remove any sticky remnants left by burned food (some of these grills come with extra replacement brushes). Please note that if your model doesn’t come with such a brush, we recommend not using it because it might scratch the surface of the electric grill.
What are some tips on how to clean an electric grill?
You should wait for the electric grill to cool down before cleaning, if you try to clean while it’s still hot some parts might be damaged or discolored and there is a risk that your hands will get burned (some parts like drip trays and plates might stay warm even after cooling down, please read the manual for more information). You may use a dry cloth or paper towel to remove any food residues; if food has burned onto the grill, we recommend pouring water onto the stains and scrubbing them with a nylon bristle (not wire) brush. Using dishwashing liquid is not recommended as this may cause the discoloration of certain parts. The appliance should be cleaned regularly to avoid that food residue accumulates and it can be harder to clean later on.
What are some tips on how to keep an electric grill clean?
If you use your electric grill at least once a week, after 10 or 20 uses you will notice that cleaning it becomes easier since parts don’t need as much scrubbing before becoming fully clean. This is because oil and grease seep into the pores of the metal surface and other parts making them more resistant to stains. If an electric grill has a non-stick coating, using cooking spray with flour before using the appliance guarantees that foods won’t stick to it. Just remember not to place baking paper directly onto the grill since this will stick to it. If you are cooking fish or other food that tends to stick, use a piece of string cheese before grilling to make sure they won’t stick even if you don’t apply any oil or butter on them.
To clean an electric non-stick grill thoroughly, preheat the oven at 180 degrees Celsius (356 degrees Fahrenheit) and place aluminum foil on the bottom rack to collect excess fat. Then place parts of the electric grill on top of the aluminum foil one at a time, this way all excess grease will be collected by the foil and no longer go into your food! Please note that certain types of food like burgers might release more grease than others so too much fat might accumulate in the bottom of the oven. If this happens, just line the aluminum foil with a new sheet to collect all the excess grease. Also, please remember that certain parts are not dishwasher safe so you will have to wash them by hand with warm water and some mild dishwashing liquid before placing them back in your electric grill so they can be thoroughly cleaned.
How to get charcoal flavor on an electric grill
Turn on the grill and wait for it to heat up
One of the most important things to do when you are baking food is preheating your grill. If it isn’t hot enough, then not only will the final product be heavy and undercooked but also potentially dangerous! The earlier in time that’s left on for longer periods helps get more heat into those pans so they come out perfectly golden brown with no burning or sticking anywhere- which makes what would have been just another day at work turn into something worth bragging about during dinner party conversation later hours afterwards.
At home bakers know this fact well: They should always start warming up their ovens now by setting them onto a low temperature before turning any other appliances power.
A few minutes before you start grilling, make sure the grill is preheated. Once heated up and ready to go, it should take about 20 minutes for an average size (or smaller) BBQ grill pan or kettle style stovetop smoker on medium heat – but again this depends largely upon its efficiency!
A good recipe will ask that we turn our cooker’s temperature all way down before even getting started with some prep work—and if there are any pots/utensils nearby then do yourself a favor: bring them over too because they won’t be needed until right at cook time so don’t forget these essentials during setup time
Once the temperature you want is reached, your grill will let you know. It’s usually by turning off its thermostat light and it may take some time for all of these different heating elements to come as close together on their respective cycles as they need too in order bake anything successfully but once that happens basting should be easy!
I always recommend waiting 10 minutes before making any changes so give yourself an extra minute when checking whether things are ready just make sure not hurry into putting something hot inside like bread or pizza because temperature night vary significantly from one grill model
It’s important to know that the longer you preheat your grill, the smaller fluctuations will become. It’s going to be less of an issue when it comes time for baking but this could definitely affect how accurately sear (or not) certain foods on a grill.
Next time you go to bake, make sure that your grill has been turned on before doing anything else.
The temperature of the oven should be set at 350 degrees Fahrenheit and if it’s not then turn up this dial!
You may like this: Top 10 Best Charcoal Grill Consumer Reports
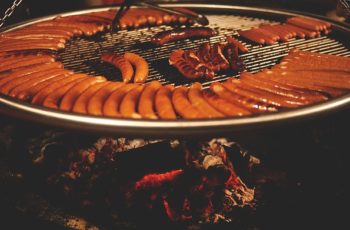
Place a few pieces of charcoal in the bottom of your grill
Place a few pieces of charcoal in the bottom of your grill. Open your grill lid and let it heat up for about 15 minutes while you prepare your food.
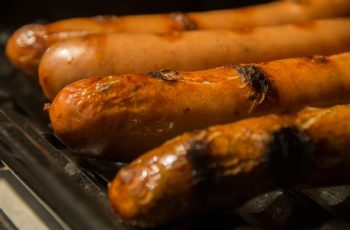
If you’re cooking something thick, like a rack of ribs, put the meat on the grill when it’s hot enough to sizzle a drop of water on its surface (10 to 15 minutes after you shut it down). For grilling thinner foods like steaks or boneless chicken breasts, wait about 20 to 30 minutes into your cook time before even placing anything over direct heat. If you are cooking both types of meats at once, start with thicker cuts first because they will be done sooner
To check if your food is done, simply place your finger on the top of it and poke around. If there’s any give to it, close your vents and let your food cook for another ten minutes. Then do the finger test again: The more firms that area feels, the closer to done it probably is. Continue cooking and testing until you’re satisfied with its texture or temperature.
Place your meat over the section of your grill grate that’s closest to the coals for searing. This will sear both sides at once without overcooking or burning it because you’re searing at a high temperature (700 degrees Fahrenheit), initial cook time (2 1/2 to 4 minutes per side) and cut thickness (3/4-inch). Grill thinner cuts of meats for about 20-30 minutes, using tongs to rotate them every five minutes.
If desired, finish cooking by moving the meat away from direct heat so it doesn’t char while cooking through. Keep an eye on the temperature inside your grill with an instant read thermometer; medium rare is 125 to 130 degrees Fahrenheit. If you don’t have a thermometer, you can always cut into the meat with a knife to check if it’s done. If your meats are cooked properly, pull them off of the grill and let them rest for five minutes before serving.
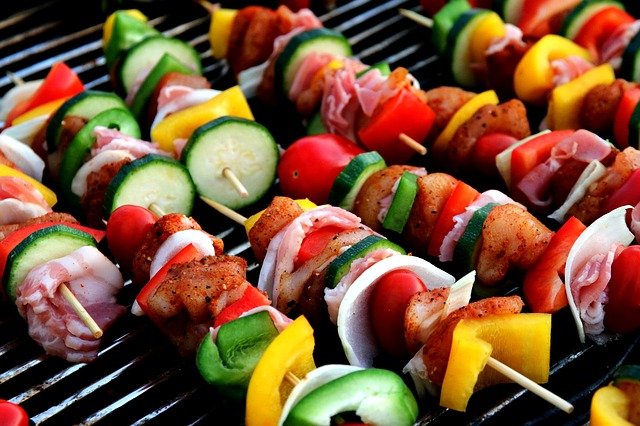
Tips: Use tongs for rotating or flipping foods on the grill. Piercing holes in your food allows heat and smoke to escape so it does not cook as evenly. Clean your grill grate with metal brush between cooks instead of during cooking because opening the lid too often allows heat to escape.
Once your charcoal is hot, place some wood chips over the top and close the lid
Wood chips are small pieces of dry wood that ignite easily when burnt. The smoke they produce is white and has a sweet aroma, but each type burns differently thus producing its own unique flavor depending on what tree it comes from (maple will have sweetness whereas hickory can sometimes be harsh).
Mildly smoky woods such as oak or cedar may also get used in cooking because their flavors don’t overpower other ingredients like some types do with stronger ones like mesquite being known for delivering depth without distinct individual notes standing out too much while still providing plenty more complexity than plain old charcoal alone would offer
Once your charcoal is hot, place some wood chips over the top and close the lid. Allow wood chips to smoke for ~20 minutes, then remove the chips. Using your gloved hand or tongs, place all of your meat on the grill grate over direct heat. If using a three-burner grill, lower the right and left burners to medium low, leaving just one burner on high. Close the lid so that it is cracked open about 1 inch at the top. This will allow air to flow in and out of your grill while you are cooking, but not so much as to send any significant amount of oxygen onto your hot coals which could cause flare ups.
If using a two-burner grill with both burners on high then leave both burners on.
If using a charcoal grill that has only one burner then turn your left or right burner to medium low so there is just one burner on high. Cook with all the vents open. This will leave one side of the grill hot and the other side cool for searing, but it also will cause more airflow under your meat which could cause flare ups. Keep an eye on the temperature inside your grill. It should be at around 325-350° F (160-175° C). If you are cooking larger pieces keep in mind that they need to come up to internal temp before they can be taken off of the heat, so take into account how long it takes for large cuts to reach an internal temp that is safe to eat. If you like your meat medium rare I recommend taking it off of the grill at around 125-130° Fahrenheit (52-54° Celsius).
Add more wood chips every 30 minutes or so to keep that smoky flavor going. If you have a hinged grill, place the hinged side up so that you can put more chips on the cooking surface.
Use A Smoker Box
Instead of using wood chips, you can opt for a smoker box instead. A smoker box is a small container designed to hold some wood or charcoal chips and let out smoke after being burnt. This type of smoking works best with an electric grill that has its lid covered in order for you not have any open flames near food when cooking on it as this can cause burning smells which are definitely unwanted!
Grill-smoking is a perfect way to add flavor and smoke into your food, without the need for meat or fish. First you will need some chips that are already blanched so they won’t burn when placed on an electric grill; then all it takes is moistening them with water before placing them onto one side of the chamber where there’s no fire below! To produce more intense flavours during cooking time reduce heat further by setting up higher temperatures (around 350°F) while thickly applying spray bottle fulled wetting over entire surface area – this helps retain moisture better than just spraying off individual flames from time to.
For those who like to smoke their food for hours on end, a thick layer of wood chips in the smoker box is essential. For shorter cooking times or if you just want some great flavor but not as much time-consuming smoky goodness this will not do what your looking for so make sure that before adding any kind of fuel source such as hardwoods and/or sawdust understand how long they’ll take before going into production mode when it comes down from temperature control changes due primarily because different types vary greatly with regards specifically length between burns depending mostly around potency sources
As it releases the flavor into your food rather than releasing smoke all over. Smoke can be harmful for some people and even dangerous in high volumes so this device lets out only gentle fumes that will not harm you or others around them at any time during use. If placed directly on top while cooking with charcoal underneath its base then there isn’t much else needed besides closing off one side of airflow circulation from escaping through vents along each edge – after all these things work best when used correctly!
Read more: 5 Best Charcoal Grill Smoker Combo
Wrap Wood Chips in a Thick Aluminum Foil
Before we get into the specific steps on how to make a foil smoke ball, it’s important that we know the in’s and out of smoking with wood chips.
One of the most important pieces of advice I can give you is to not soak your wood chips! This method may cool down some hot coals, but it’s very counterproductive in terms on achieving a smokey flavor and will often times produce more steam than actual smoke. Dry logs have been shown by tested professionals as being better for smoking with because they don’t require water anywhere near them – which means no wetter material equals less work cleaning up later after an event has occurred (or if there are children around).
When you add the foil-like smoke ball at just the right time, it will help with reducing woodiness and ensuring that your next smoking session turns out even better than expected. Adding these special little devices into our process was key to making sure everything came off as smoothly and tasted delicious!
Step 1: Place Wood Chips on Aluminum
To get the most flavor out of your smoker, it’s important that you use wood chips. There are many different types and styles available which is why I like to experiment by using several kinds at once!
Place a handful or so in the middle as demonstrated here with some 18×18 aluminum foil torn up into small pieces for easy handling when folding over ends together tightly before sealing them off from any moisture inside (to avoid molding). After making sure all sides have been sealed tight then simply wrap this little balled package well.
Step 2: Poke Four Holes
This part is essential to allow for your smoke to ventilate and properly cook the meat. Just take any knife, poke four holes in a foil ball right over medium heat until they are all smoking hot (about five minutes).
Put a handful (or several) onto the middle of aluminum foil. About 1 cup per grill should be good for most meats requiring longer grilling times, like beer can chicken! For smokes that are finer in consistency and require less smoke at once – such as pork butt or ribs- make two smoke pouches so you’re able to put one on while cooking another batch without wasting any precious heat source energy
2 cups wood chips1/4 cup mesquite powder3 tablespoons minced onion salt small pinch cayenne pepper
Step 3: Place Ball on Fire
This is the easiest step! Just throw your new masterpiece onto the fire. The foil will insulate it sufficiently so that you can smoke and not burn up immediately, but when a ball stops smoking- pull them out with tongs for fresh ones to replace in between burns or dishes if needed because they won’t be burnt as quickly due their insulation from previous flames (stops burning).
To avoid a mess, you’ll want to fold all ends of the aluminum foil together and wrap it in order for your burrito-looking pouch.
Remember, it doesn’t take much exposure to smoke for the flavor of grilled food! Just keep your lid closed and grill like you normally would. The smoky aroma will permeate throughout both sides of whatever meat or vegetables are being cooked which is really all that’s needed in order get an amazing smoked taste with only a minimal amount effort on behalf our palettes
Use Liquid Smoke
Liquid smoke is a unique condensation of the natural wood burning process, invented by Ernest H. Wright when he noticed black liquid dripping from his stove pipe while working at an early age in print shop
This article provides some background information on this fascinating substance and its inventor which may be useful for anyone who’s interested!
Smoke has been around for centuries, and most people are familiar with the how-to. It’s a simple process of burning wood until it becomes hot enough to smoke without causing any harm or damage; however there have always been those who were fascinated by what makes up this white billowing substance that comes out from fireside chimneys in houses all across town…
Liquid smoke is the perfect addition to any marinade or barbecue sauce. It will add a delicious smoky flavor without all those pesky cooking steps that can take up your entire day!
How do you use liquid smoke?
Liquid Smoke has many different uses, but one of its best qualities are how versatile it really is for food preparation – you could even try using liquid smoke on some vegetables if spice isn’t really something which would go well with what tastes good in general from other spices added during preparation time (though I think most people would agree these additions just make everything better).
Add a little liquid smoke to your next dish for an extra boost of flavor. For meats like pork, beef or chicken you can use it sparingly and add just before serving so that the smokiness lasts throughout cooking time; however, if using vegetables be sure not overdo because this might make them taste too salty- smoked flavors are meant as accents after all! You could also use some on top raw veggies such as salads I recommend tasting first though since adding too much may create problems with other ingredients in those sauces/dressings not being compatible with how strong their own tastes were already.
When smoking meats and fish, it is important to use the right wood-flavors of liquid smoke. For example, mesquite gives off a smokier flavor than applewood or hickory varieties which makes for better tasting food when cooked on an open flame grill.
For those who don’t have access to a grill or smoker but want the authentic smoked taste of meats and fish, liquid smoke is all they need. Because its concentrated flavor can be overpowering in higher doses with foods (and more difficult on your stomach) only 1/4 teaspoon should suffice for most dishes – this will also give off less toxic fumes than cooking salads typically requires much more oil-based condiments such as butter!
A few drops may not seem like much at first glance; however, when mixed into sauces and other dipping options you’ll find yourself using even less because instead up adding unhealthy fats from animal products onto our plates we’re giving them back by taking advantage.
Liquid smoke is used to add a smoky flavor that’s not possible with just cooking. It can be added in small doses from homemade barbecue sauces and cowboy beans, all the way up through cocktails for an extra level of max taste!
>>> BBQ Smoking with Alternative Fuel (how to get charcoal flavor on an electric grill)
See more: Top 15 Best Infrared Grills for 2022
Can I put aluminum foil on an electric grill?
This is a question that many people may be asking themselves with the increased popularity of electric grills. People are always looking for new ways to enhance their experience, which is why they try things like adding different types of woods to the fire for different flavor profiles or using aluminum foil on an electric grill.
Yes, you can safely put aluminum foil on an electric grill. Electric Grills are a great way to cook food, but they do have their limitations. For instant you can’t use aluminum foil on an electric grill because of the danger associated with touching hot surfaces and possibly burning yourself or causing injury when handling metal tools while cooking. That doesn’t mean there isn’t any other benefit that comes from using this material though! If your grilling asparagus in oil seasoned with garlic then wrapping them up will give off those flavors throughout all parts of each spear which makes for much more delicious dining experience.
Aluminum foil can keep food from spilling and make cleanup easier. However, if you use it on an electric grill then the meat won’t get those perfect grill marks because of its non-stick surface which only works with gas grills or wood fired brick ovens to achieve this effect. You should also avoid using aluminum for cleaning your BBQ after cooking as doing so could scratch up the metal plates underneath – even leading some people who own them getting damaged goods!
Conclusion
To get that charcoal flavor in your food, try using a technique called “indirect grilling”. This is where you place the meat over indirect heat and allow it to cook with little or no contact from any source of flame. It may sound counter-intuitive but this method has been shown to produce more tender results than direct cooking methods such as searing and grilling, which can toughen up meats like steak if not done correctly. As an added benefit for those who want to use their grill year around without having the hassle of cleaning out all that ash after each cookout session, indirect heat will also keep your grill grate cleaner since there won’t be anything burning on it.
The charcoal flavor on the grill is not only important for your taste buds, but also gives you a variety of different flavors to choose from. There are many electric grills with amazing options that will allow you to get that charred flavor without all the mess and fuss. Take some time now to review the list of best electric grills above and find one perfect for your needs!
See more: